简体中文
繁體中文
English
Pусский
日本語
ภาษาไทย
Tiếng Việt
Bahasa Indonesia
Español
हिन्दी
Filippiiniläinen
Français
Deutsch
Português
Türkçe
한국어
العربية
How to Open a Demo Account with easyMarkets? (Web)
Abstract:Looking to trade with easyMarkets? Here's our straightforward guide on how to get started with a demo account.
easyMarkets Platform Registration (Web)
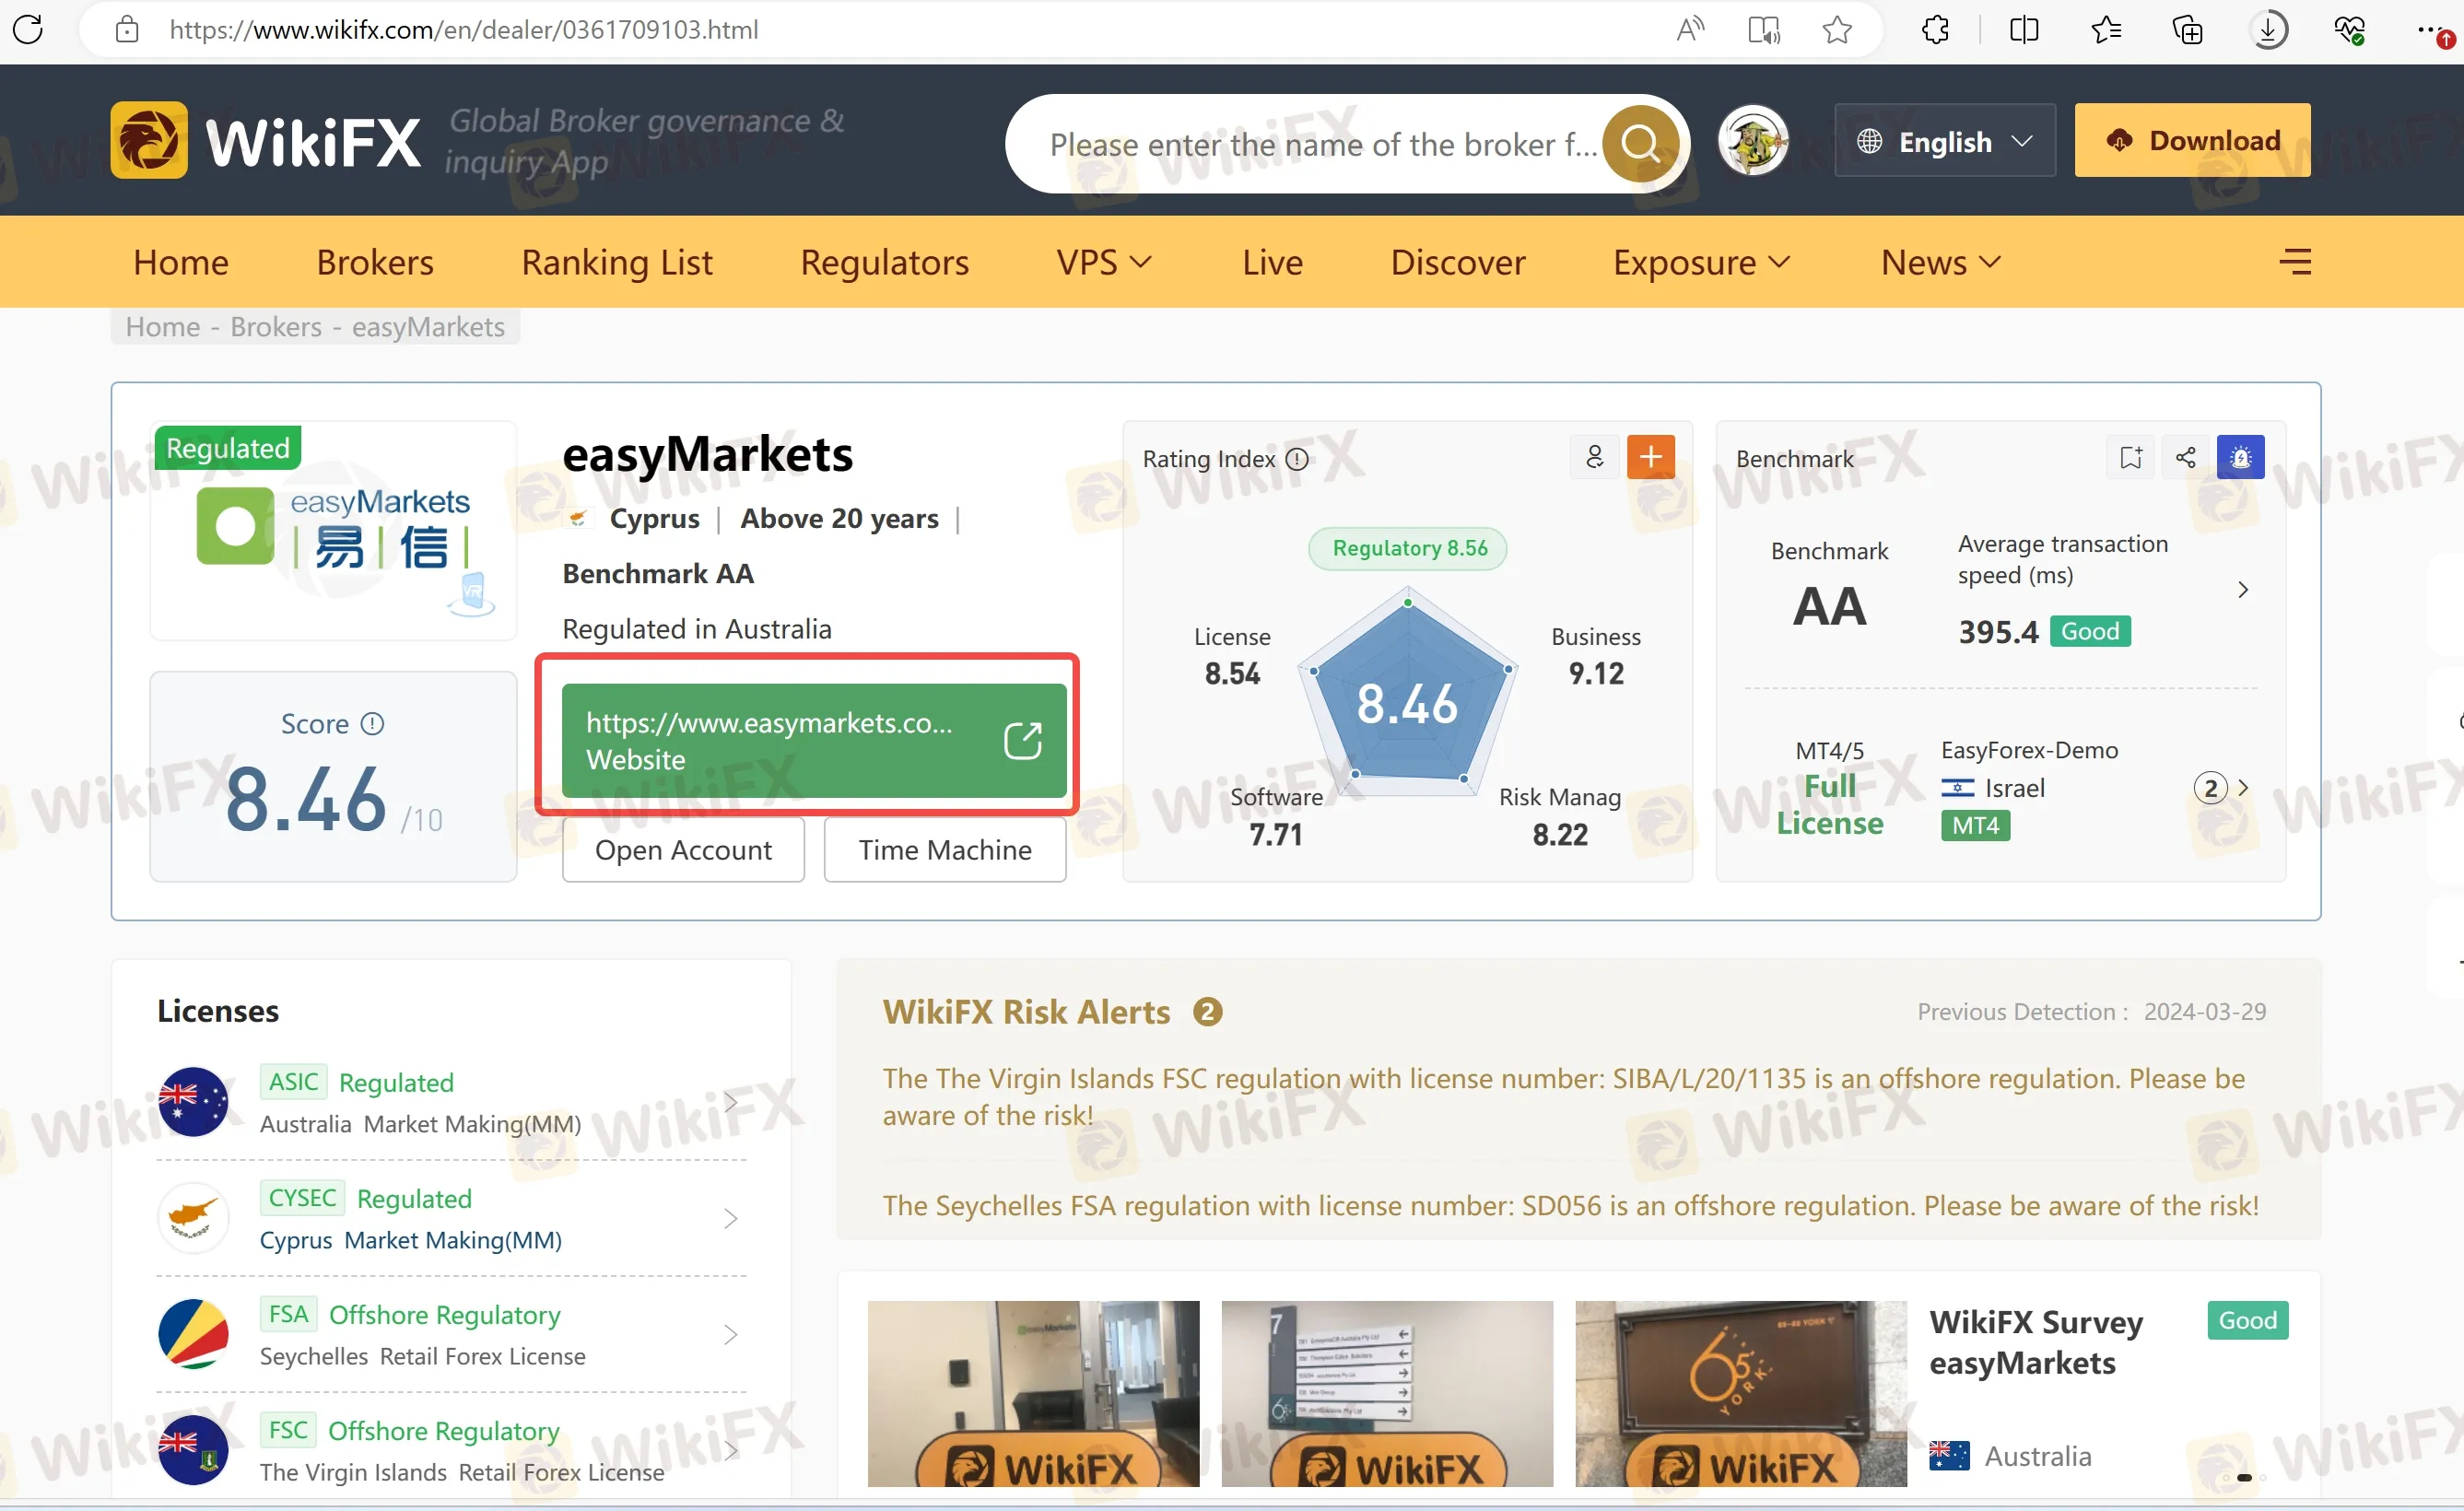
Step 1: You can directly access easyMarkets on WikiFX by visiting the following URL: https://www.wikifx.com/en/dealer/0361709103.html. Then, simply click on the green label as shown in the screenshot below.

Step 2: You have now successfully navigated to the official site of easyMarkets. On the homepage of easyMarkets, click on 'Sign UP' to start account registration.

Step 3: Fill in 'Your first name', 'You last name', 'Your email', 'Create password' and 'Your phone number' and click 'Sign up'.

Step 4: Select the country of residence.

Step 5: After, click 'I confirm' and open an account successfully.

Step 6: Now, you can start trading by clicking 'Deposit Funds'.

Step 7: Select account currency and click ‘Submit’.

Step 8: Select a payment method.

Step 9: To click 'Complete profile' to complete your personal profile so as to create MT4 account.

Step 10: If you prefer not to begin with a live account, you have the option to click on 'DEMO'.

Step 11: Click 'Continue' so as to switch live account to demo account.


easyMarkets Account Registration (MT4)
Note: The MT4 for foreign exchange market trading is also the only tool for us to make money in trading, and mastering the basic operations is a necessary skill for every trader.
Step 1: Choose and click the MT4 version of your choice.

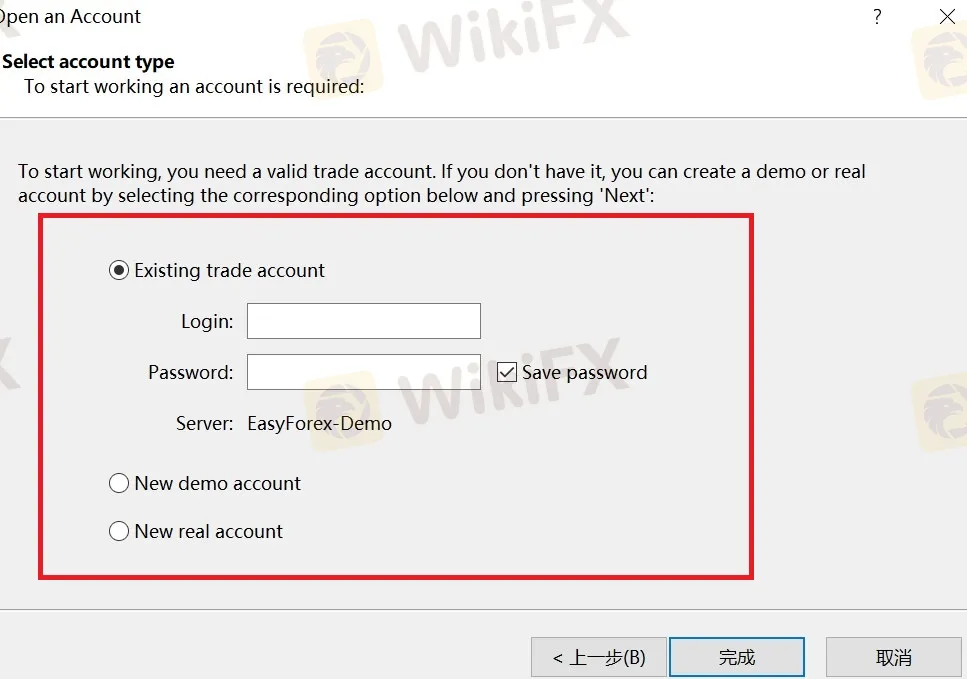
Step 2: For this illustration, we'll be using MT4 on a PC platform as an example. There are two server options available to you - Easyforex-Demo and Easyforex-Live. For the purpose of this illustration, we'll select Easyforex-Demo. After clicking 'Next Page', you will be directed to the 'Select account type' page.


Step 3: Click 'New demo account' and 'Next Page'.

Step 4: Fill in 'name', 'E-mail', and 'Phone'.
Step 5: Click 'Account type' and choose the type of your preference.

Step 6: Click 'Deposit' and choose the minimum deposits of your preference.

Step 7: Click 'Leverage' and choose the leverage of your preference and then click 'Next Page'.

Step 8: Click 'Finish' and finish the process.


Disclaimer:
The views in this article only represent the author's personal views, and do not constitute investment advice on this platform. This platform does not guarantee the accuracy, completeness and timeliness of the information in the article, and will not be liable for any loss caused by the use of or reliance on the information in the article.
WikiFX Broker
Latest News
Interactive Brokers Launches Forecast Contracts in Canada for Market Predictions
Authorities Alert: MAS Impersonation Scam Hits Singapore
INFINOX Partners with Acelerador Racing for Porsche Cup Brazil 2025
The Impact of Interest Rate Decisions on the Forex Market
Billboard Warns of Crypto Scams Using Its Name – Stay Alert!
STARTRADER Spreads Kindness Through Ramadan Campaign
Rising WhatsApp Scams Highlight Need for Stronger User Protections
A Trader’s Worst Mistake: Overlooking Broker Reviews Could Cost You Everything
How a Housewife Lost RM288,235 in a Facebook Investment Scam
The Daily Habits of a Profitable Trader
Currency Calculator


